Archive for the ‘Step-By-Step’ Category

JDev & ADF Goodies

Since JDeveloper 12.1.3 the invoke action used in earlier version has been deprecated. Users still using the old invoke action to load data on page load should migrate their code to using the default activity in a bounded task flow instead. This article describes how to use the executeWithParams method as a default activity in a bounded task flow (btf) to load data to be shown in a region. For this we implement a common

Use Case:
in a text field the user enters a string which should be used to look-up data in the DB and show the data as a table in a region.
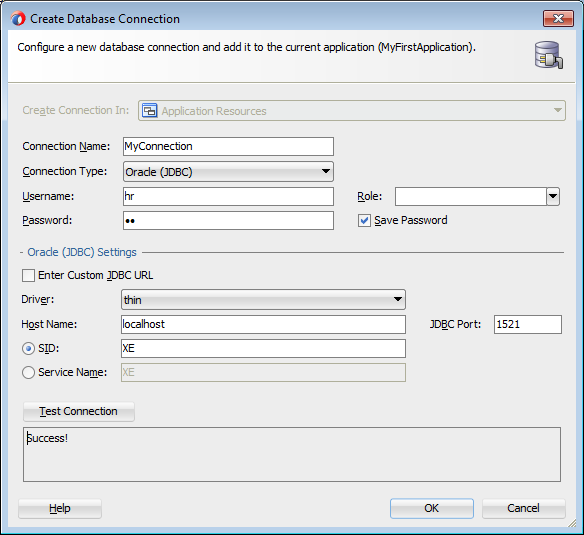
For this we use the HR schema and build a look-up for locations after the name of the city of the location. In a page the user can insert the name or part of a cities name into a text field. This input is…

View original post 634 more words

Oracle ADF

Use Case – Create a custom validator to validate and To/From Date

Solution – 

JSPX – 

<?xml version=’1.0′ encoding=’UTF-8′?>
<jsp:root xmlns:jsp=”http://java.sun.com/JSP/Page” version=”2.1″
xmlns:f=”http://java.sun.com/jsf/core”
xmlns:h=”http://java.sun.com/jsf/html”
xmlns:af=”http://xmlns.oracle.com/adf/faces/rich”>
<jsp:directive.page contentType=”text/html;charset=UTF-8″/>
<f:view>
<af:document id=”d1″>
<af:form id=”f1″>
<af:panelFormLayout id=”pfl1″>
<af:inputDate label=”End Date” id=”endDate”>
<f:validator validatorId=”DateToFromValidator”/>
<f:attribute name=”startDate” value=”startDate”/>
</af:inputDate>
<af:commandButton text=”Submit” id=”cb1″/>
</af:panelFormLayout>
</af:form>
</af:document>
</f:view>
</jsp:root>

Validator – 

package view;

import java.util.Date;

import javax.faces.application.FacesMessage;
import javax.faces.component.UIComponent;
import javax.faces.context.FacesContext;

import javax.faces.validator.Validator;

import javax.faces.validator.ValidatorException;

import oracle.adf.view.rich.component.rich.input.RichInputDate;

public class DateToFromValidator implements Validator{
public void validate(FacesContext facesContext, UIComponent uIComponent,
Object object) throws ValidatorException {
String dueDateComponentId = (String)uIComponent.getAttributes().get(“startDate”);
RichInputDate richInputDate =(RichInputDate) uIComponent.findComponent(dueDateComponentId);
Date startDate = (Date)richInputDate.getValue();
Date endDate = (Date)object;
String labelStartDate = richInputDate.getLabel();
String labelEndDate = ((RichInputDate)uIComponent).getLabel();
if((startDate == null)||(endDate == null)||(endDate.compareTo(startDate)<0)){
FacesMessage facesMessage = new FacesMessage();
facesMessage.setSummary(labelStartDate + “/”+ labelEndDate + ” Validation Error!”);
facesMessage.setDetail(labelStartDate + ” should be less than ” + labelEndDate);
facesMessage.setSeverity(facesMessage.SEVERITY_ERROR);
facesContext.addMessage(uIComponent.getId(), facesMessage);
}
}
}

Config File (Adfc-Config)- 

<?xml version=”1.0″ encoding=”windows-1252″?>

View original post 16 more words

Shay Shmeltzer's Oracle JDeveloper and ADF Blog

Ever wondered how to notify users of your ADF Faces application that they have uncommitted changes on their ADF page before they go off and check their facebook page (or just close the browser’s tab)?

Well there is a little nifty feature in ADF Faces that makes this trivial – the uncommittedDataWarning property of your af:document tag.

I don’t remember at which specific version of JDeveloper this feature was added, but a quick google for “unsaved changes in ADF” brought up some older solutions and I figured I’ll raise the awareness of this relatively newer feature with a little video.

By the way there is a longer explanation of this un-saved changes feature in relation to bounded taskflows here.

Another thing I show in the video is something that often causes newbies to stumble – and that’s the reason why commit/rollback are not enabled on your page. This is…

View original post 86 more words

Environment (JDeveloper 11.1.1.5.0, ADF BC, hr schema)

Many to many relationship can’t be represented in the physical database (i.e. in the actual database table) because you can’t just associate one key from one table with another key from the other table. However, many to many relationship can be broken down into a series of two or more of one to many relationships through a table called intersection table. Intersection table is simply a table that contains the primary key of each of the table being connected. Consider the followoing cases as examples about many to many relationships:

  1. A student can take many different courses, and each course can be taken from many different students.
  2. An employee can change his job several times during his career life, and each job can be held by several employees.

In this example I will explain how to implement a many to many association based…

View original post 477 more words

Environment (JDeveloper 11.1.1.5.0, ADF BC, ADF Faces, hr schema)

ADF Faces provides several validation types; UI component attributes validation, default ADF Faces validators, and custom ADF Faces validators. The last type (custom ADF Faces validators) enables you to create your own validation logic in a Java class then you can use it as a validator to your UI component. The custom validator can be created for a specific component in a single page, or can be created to be used in all pages in your application. In this example, I will explain how to build your own custom validator that can be used in all pages. This example based on hr schema, mainly on Employees table, and assumed that you already have built your BC. Our business rule is that the PHONE_NUMBER attribute should be at least 9 digits. The steps to build your own validator are:

  1. Create a Java…

View original post 297 more words

Oralublog - Oralution's Blog

This post will assume that you have, at this point, implemented your Dependent LOV, using ADF Business Components the following;

  • You have View Objects and you have created  View Criterias.
  • Create some LOVs for View Objects attributes.
  • Specifying View Criteria over the View Accessors that retrieves your LOV. (implementing the dependency)

View original post 225 more words

It is possible to disable each component one by one but the easiest method is getting the list of all the components within the af:panelGroupLayout on page load and setting the properties to the desired status for each one. The same solution can be performed also for other surrounding element.

First bind your component (af:panelGroupLayout in this case) in your managed bean:


RichPanelGroupLayout yourPanelGroupBind;
public void setYourPanelGroupBind(RichPanelGroupLayout yourPanelGroupBind) {
this.yourPanelGroupBind = yourPanelGroupBind;
}
public RichPanelGroupLayout getYourPanelGroupBind() {
return yourPanelGroupBind;
}

Then within a method do this:


List outer = yourPanelGroupBind.getChildren();
for (UIComponent outerComponent : outer) {
if (outerComponent instanceof RichPanelFormLayout) {
List uiComponentList = outerComponent.getChildren();
for (UIComponent uiComponent : uiComponentList) {
if (uiComponent instanceof RichPanelLabelAndMessage) {
List uiComponentList2 = uiComponent.getChildren();
for (UIComponent uiComponent2 : uiComponentList2) {
if (uiComponent2 instanceof RichInputText) {
((RichInputText)uiComponent2).setDisabled(true);
} else if (uiComponent2 instanceof RichSelectBooleanCheckbox) {
((RichSelectBooleanCheckbox)uiComponent2).setDisabled(true);
} else if (uiComponent2 instanceof RichInputDate) {
((RichInputDate)uiComponent2).setDisabled(true);
} else if (uiComponent2 instanceof RichSelectOneChoice) {
((RichSelectOneChoice)uiComponent2).setDisabled(true);
} else if (uiComponent2 instanceof RichPanelGroupLayout) {
List uiComponentList3 = uiComponent2.getChildren();
for (UIComponent uiComponent3 : uiComponentList3) {
if (uiComponent3 instanceof RichInputText) {
((RichInputText)uiComponent3).setDisabled(true);
} else if (uiComponent3 instanceof RichSelectBooleanCheckbox) {
((RichSelectBooleanCheckbox)uiComponent3).setDisabled(true);
} else if (uiComponent3 instanceof RichInputDate) {
((RichInputDate)uiComponent3).setDisabled(true);
} else if (uiComponent3 instanceof RichSelectOneChoice) {
((RichSelectOneChoice)uiComponent3).setDisabled(true);
}}}}}}}

The code above checks for a wide variety of components that might be located within the af:panelGroupLayout.

This post is about some tricks to the  <af:calendar> component. For a detailed guide and tutorial to <af:calendar> you may follow these links:

Working with ADF Faces Calendar Component – An Oracle JDeveloper How To Document 

ADF Calendar Summary – oracle.adf.view.rich.component.rich.data.RichCalendar

To change the colors of the events in <af:calendar> we should override the activityStyles. In your managed bean create a HashMap variable and override its get() method as shown below:

private HashMap activityStyles = new HashMap<Set<String>, InstanceStyles>();

public HashMap getActivityStyles() {
try {
HashSet event1 = new HashSet<String>();
HashSet event2= new HashSet<String>();
HashSet event3= new HashSet<String>();

event1.add(“Milestone”);
event2.add(“Obligation”);
event3.add(“Task”);

activityStyles.put(event1, CalendarActivityRamp.getActivityRamp( CalendarActivityRamp.RampKey.PLUM ));
activityStyles.put(event2, CalendarActivityRamp.getActivityRamp( CalendarActivityRamp.RampKey.ORANGE ));
activityStyles.put(event3, CalendarActivityRamp.getActivityRamp( CalendarActivityRamp.RampKey.MIDNIGHTBLUE ));

} catch (Exception e) {
e.printStackTrace();
}
return activityStyles;
}

In calendar property:

activityStyles


In calendar activity attributes you have to select in Tags the property of your view object, based on which the colors are meant to change.

tags


The other calendar activities in the above photo are not relevant, you may have other names for your attributes.

This tutorial is a step-by-step on building a simple Fusion Web application with JDeveloper and ADF 12c. The steps are the same as for 11g. This tutorial doesn’t give detailed explanation of particular parts but just an overview.

  • Open JDeveloper 12c
  • File > New > Application > ADF Fusion Web Application

Image

  • Name your application and change the application directory if you wish

Image

  • Click ‘Next’ to pass through other steps and do not change nothing. Press ‘Finish’.
  • Your application should now have two projects: ‘Model’ and ‘ViewController’. Model will contain the application business logic and the ViewController will contain the JSF/JSP pages and the managed beans if needed.
  • Right click on your Model and go to: > New > From Gallery and here click on >ADF Business Components > Business Components From Tables

Image

  • In this moment this windows should show up

Image

  • Click on the green plus and fill the fields in the other window as shown below.
  • You may click on the ‘Test Connection’ button to test the values. (Database user/pass is same if you did not change it by yourself: hr/hr)

Image

  • Click OK in the both windows and this window should open now. Below on the left side are the tables that HR schema contains. Don’t worry if you see listed some other tables here, they are not related to this tutorial.
  • In this step we will chose which tables will be used as EntityObjects in our application. We will chose only Employees and pass it to the right just as below and click Next.

Image

  • In this step we can chose which EntityObjects will be used as ViewObjects in our application. We only have one EntityObject listed in the right, so pass it in the left as shown below and click ‘Next’.

Image

  •  In the next step, JDeveloper allows us to select which database tables we want to use as Query Based – ViewObjects. In this application we wont use any of those so just press ‘Next’ till the end without changing nothing and Finish.
  • Your application should look like this now:

Image

  • Now we will create the first JSF page of the application. Right click on ViewController and chose >New>Page and give a name to your page

Image

  • Now expand the DataControls pane and expand your AppModuleDataControl. There should be EmployeesView1 listed. Now you just have to drag & drop it on your JSF page.

Image

  • Chose ADF Form from the list and tick Row Navigation and Submit as shown here

Image

  • Now click OK and run your application. (Right click on your page and RUN)
  • Your application is now ready.

Image